

CrizzyStudio/Shutterstock
While not everyone is convinced that an iPad can replace a laptop, it works pretty well as an everyday tool for browsing websites, streaming, and using social media. Digital artists and other creative professionals can also benefit from its compact nature, especially when working on the go. As part of the Apple ecosystem, the iPad fits seamlessly alongside Macs and iPhones, augmenting existing workflows with a lot of useful, hidden gestures. Similar to the iPhone, the iPad can capture, edit, and share screenshots across devices and platforms easily.
Now, there are many reasons why someone would need to take screenshots on their iPad, such as when they’re trying to send step-by-step instructions, annotate something to be edited, or simply sneakily forward a picture of their crush’s latest social media post. So, if you’re looking to snap a screenshot on your iPad, here are several ways to do it, as well as some additional features that you might not know about.
How to take a screenshot on your iPad
Quina Baterna/SlashGear
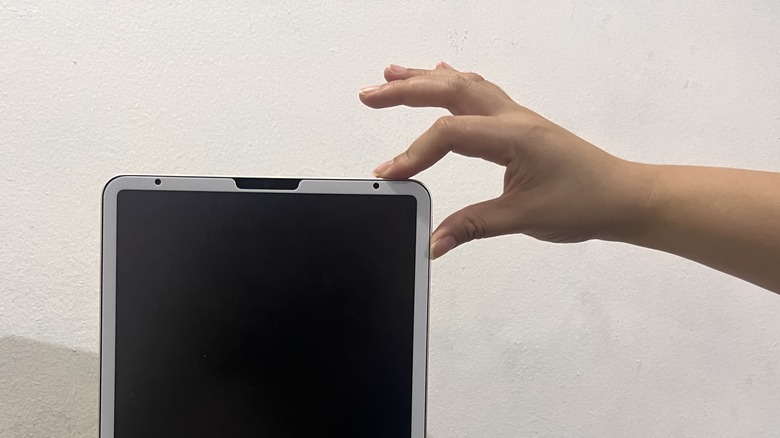
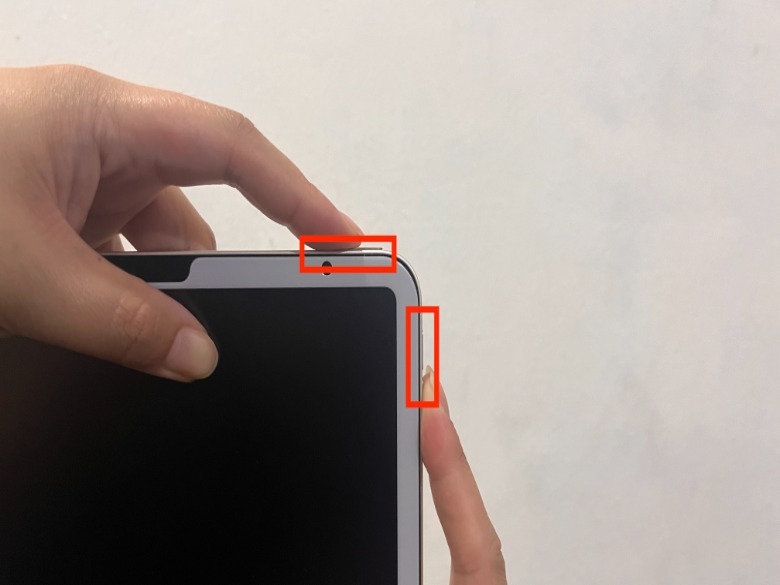
Depending on your iPad model, the location of the buttons you need to press to capture a screenshot will differ. For example, if you are using an iPad model that uses Face ID, you’ll need to press the top button and either one of the volume buttons, which will be located either at the side or on the top of your iPad.
 Quina Baterna/SlashGear
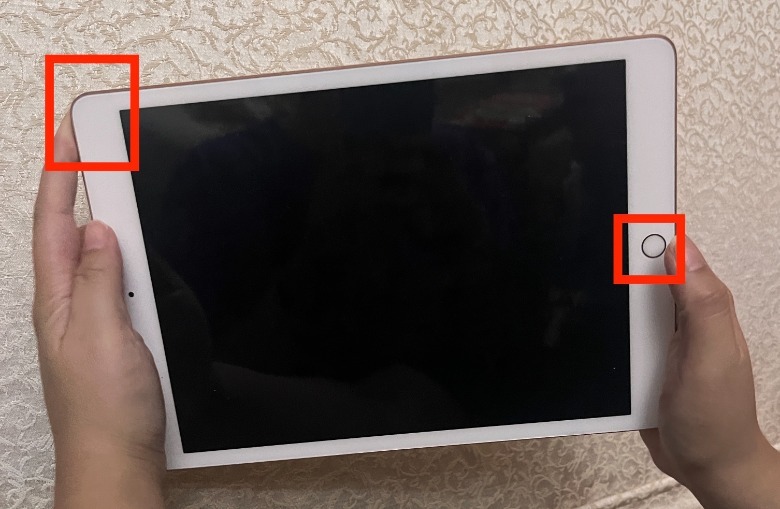
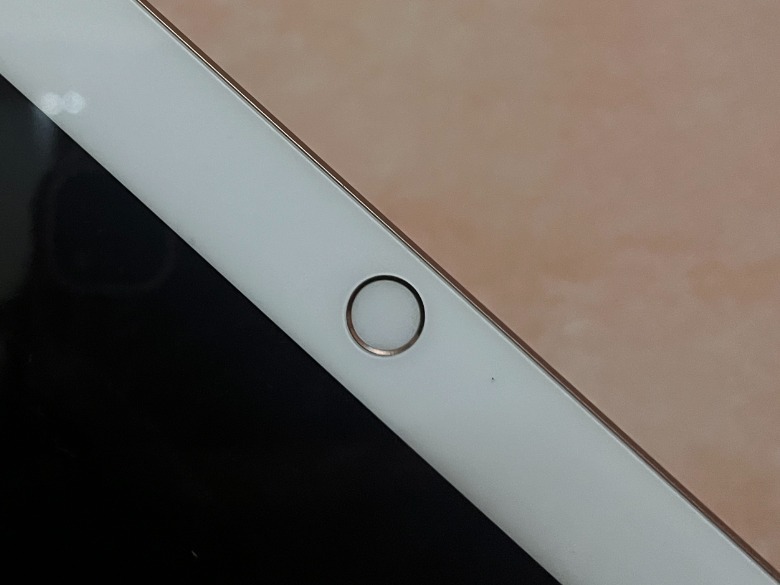
If you’re using an iPad model with a Home button, you’ll need to press the Home button and the top button in a similar way. Unlike the Face ID models, which have buttons only on the side, the Home button can be found on the screen itself.
 Quina Baterna/SlashGear
Some iPad models do not have a physical Home button, including many of the latest iPad Pro models, like the iPad Pro 11-inch (2nd generation onwards), iPad Pro 12.9-inch (3rd generation onwards), iPad Air (4th generation), iPad Mini (6th generation), and iPad (10th generation).
 Quina Baterna/SlashGear
Some older iPad Pro and iPad models that have a physical Home button include the iPad Pro 12.9-inch (2nd generation), iPad Pro 10.5-inch, 9.7-inch, and 12.9-inch (1st generation), iPad Air (1st to 3rd generation), iPad mini (1st to 5th generation), and iPad (1st to 9th generation).
To determine whether you successfully took a screenshot, pay attention to the shutter sound, the temporary flash, and the thumbnail that appears in the lower-left corner of your screen.
How to take an iPad screenshot with an Apple Pencil
Avid Photographer. Travel The World To Capture Moments And Beautiful Photos. Sony Alpha User/Getty Images
As one of the essential accessories that iPad users should have, the Apple Pencil can help turn your iPad into a piece of paper or canvas, and take a screenshot. To take a screenshot of your iPad using an Apple Pencil, lay the tip down on either bottom corner of the screen and swipe up. If done correctly, you will hear a shutter sound and see the screen flash for a brief moment. Once you take an iPad screenshot using your Apple Pencil, you can use Markup to make changes.
Here’s how:
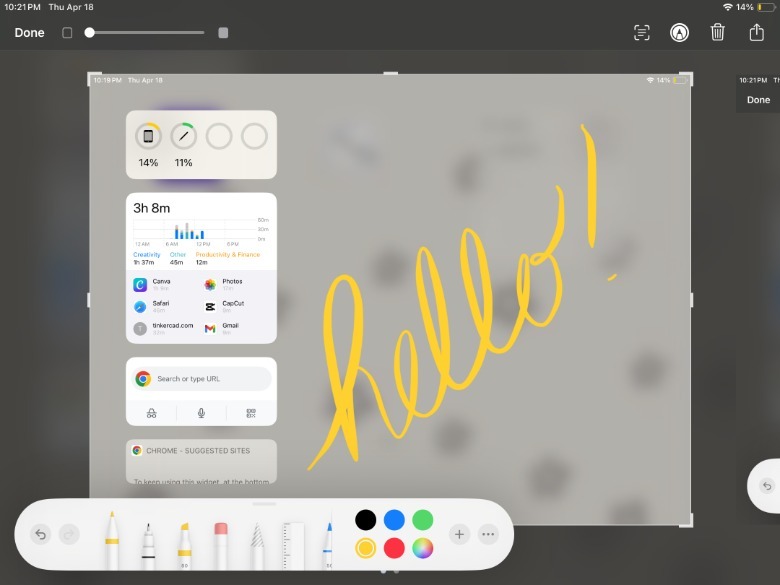
- In the screenshot preview screen, tap the pen icon in the upper-right corner of the screen.
- In the lower-left portion of the screen, tap the pen image located inside a circle.
- Select your preferred tool and proceed to mark up the screenshot.
Quina Baterna/SlashGear
It’s possible to write, sign, scribble, or draw on the screenshot. To do this, you can use an array of pen types, line weights, opacity options, and colors. For a little extra help, you can use the eraser, ruler options, and undo/redo buttons. Lastly, if you want the option to draw with your finger or further adjust the Apple Pencil settings, tap the more or three dots icon.
Aside from taking screenshots, there are a few other tips that Apple Pencil users need to know, such as enabling scribbling tools and exploring all the ways double tapping can be useful.
Use AssistiveTouch and Siri

AnnGaysorn/Shutterstock
One of the most annoying things about the physical Home button on both the iPhone and iPad models is that it stops working. Thankfully, Apple has provided an alternative way to take screenshots using the Accessibility tools.
In general, Accessibility tools are primarily designed for people who need extra help with their Apple devices, such as people with disabilities, hearing issues, and other physical limitations. However, you can also use its AssistiveTouch features to help manage broken iPad buttons and take screenshots.
Here’s how:
-
On your iPad, go to the Settings app.
-
Tap Accessibility.
-
Under Practical and Motor, tap Touch.
-
At the top of the page, tap AssistiveTouch.
-
Next to AssistiveTouch, toggle on the button.
-
Next to the Custom Top Level Menu, tap the right-facing arrow.
-
Under Tap An Icon To Change, tap the minus sign until one icon remains.
-
Tap the remaining icon.
-
Under System, select Screenshot.
Afterward, you’ll be able to take a screenshot every time you press the AssistiveTouch button like a camera shutter.
Using Siri, Apple’s voice assistant, you can also take screenshots with just your voice. To ask Siri to take a screenshot, you have to make sure that Siri is enabled on your iPad first by going to the Settings app and then tapping Siri & Search. Then, under Ask Siri, toggle on the button next to Listen for “Hey Siri.” Once it is enabled, all you have to do is say, “Hey Siri, take a screenshot.”
How to find and share iPad screenshots

CrizzyStudio/Shutterstock
When you take an iPad screenshot for the first time, you can easily share the raw or marked-up version directly from the preview. To do this, click the share icon located in the upper-right corner of the screen.
However, if you’ve already dismissed your screenshot or want to send a screenshot you’ve taken minutes before, it will usually save in the Photos app. Typically, if you’ve just taken the screenshot, it will appear as the last photo in your Recents album. If you’re trying to locate and share an older screenshot, here’s how.
-
On your iPad, launch the Photos app.
-
Under Media Types, tap Screenshots.
-
Browse the album for which screenshots you want to share.
-
In the upper-right corner, tap the share button.
Afterward, you can share your screenshot via social media apps, messaging apps, AirDrop, or Mail. You can also save it in a native iOS app like Notes, Files, or Reminders. Alternatively, you can print the screenshot directly and add it to a shared album.
Tips when taking an iPad screenshot
Nyc Russ/Getty Images
Aside from the benefits of the Mark Up tool, there are many other screenshot features at your disposal. For example, you can control how much of your screen will be included in the screenshot. To do this, after you capture a screenshot, tap the thumbnail before it disappears. If there are elements of the screenshot you want to exclude from the final output, you have the option to crop them by dragging the sides of the frame.
You can also choose to take a screenshot of just the screen in view or the entire page you are working on, which might extend what a screenshot captures beyond what your iPad screen can display all at once. In this case, once you’ve captured a screenshot and tapped the thumbnail before it disappears, select either Screen or Full Page. The Full Page screenshot feature is a useful tool for capturing things like an entire document or webpage. In addition, you can annotate the file before saving it.
Once you’re satisfied with your screenshot, tap Done in the upper-left corner of the screen, and if you choose, you can select Save PDF to Files. If your screenshot is saved as a PDF in Files, you can make the most of the native iOS file management with features like editing, compressing, and sharing with mail apps.