How to turn any SSD into a DIY external drive
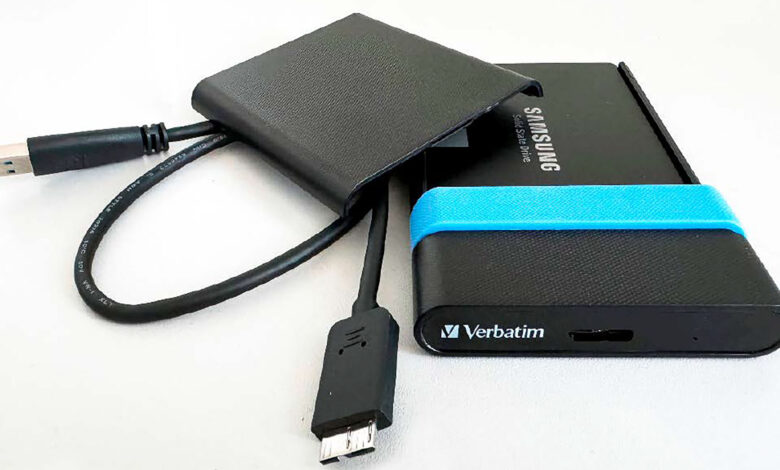

Image: IDG
SSDs are now the norm in computers. With older laptops and desktop PCs, the low capacity of the original SSD is usually the main reason for an upgrade, with the old SSD replaced by one with more space.
Further reading: The best SSDs
However, the old SSD need not be retired completely — it can still be put to good use as external storage.
Think of its repurpose as a means of storage when travelling, or as a fast temporary storage device, or for cloning other SSDs.
There are customized external USB enclosures for all purposes.
In all cases, installation is quick and easy. Read on to find common and perhaps even surprising solutions for your used SSD — including some points you should pay attention to in order to avoid a bad purchase.
Further reading: The best external drives
External enclosures for 2.5-inch SSDs
One of the easiest ways to seamlessly continue using your old 2.5-inch SSD is to install it in an external hard drive enclosure.
Such an enclosure is suitable for both HDDs and SSDs and can usually accommodate drive thicknesses of 7 and 9.5 millimeters. You can choose between plastic and aluminum for the enclosure material.
The metal versions are generally slightly more expensive than plastic enclosures. You can invest as little as $10 to get started.
As a rule, you do not need any tools to install your 2.5-inch SSD.
One example is the Ugreen 2.5″ Hard Drive Enclosure, which you can find on Amazon for around $10. Here you simply slide the top cover open to insert the drive.
Connect the internal 2.5-inch drive to the SATA III port when inserting the drive. The external SSD is fully installed as soon as you replace the cover and slide it shut.
When connecting to the computer, most external enclosures for 2.5-inch hard drives make do with USB 3.2 Gen1 (formerly USB 3.0). The theoretical transfer speed here is a maximum of 5Gbps. In purely mathematical terms, transfer rates of up to 500MBps are possible.
The results you actually achieve also depend on the internal SSD drive. In our test with the Samsung 860 EVO SATA SSD, we achieved around 430- to 450MBps in sequential read and write with the CrystalDiskMark benchmark tool.
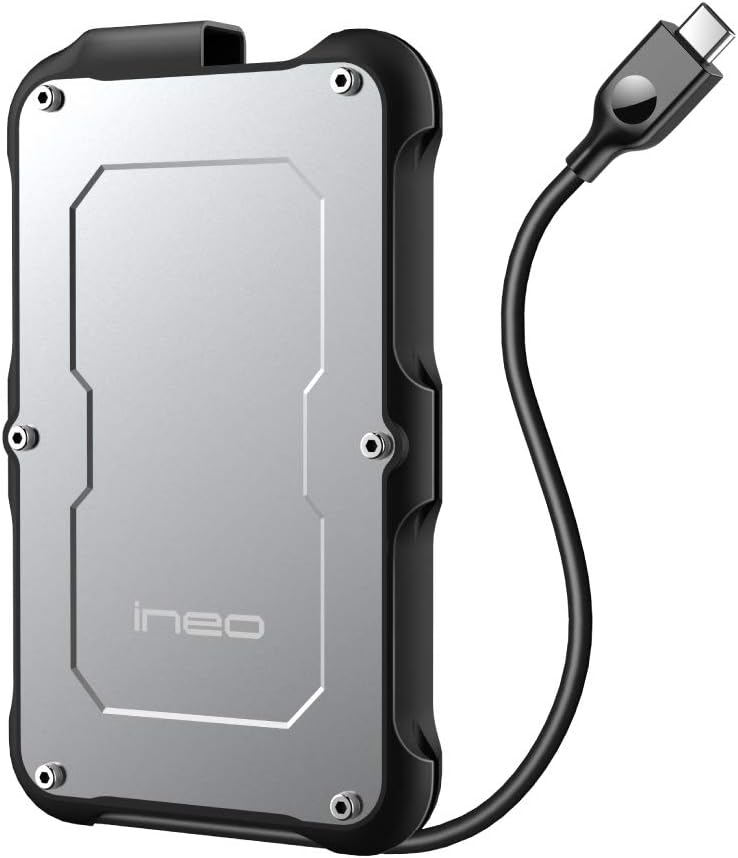
More speed and features also lead to higher prices for external 2.5-inch SATA enclosures, as with this Ineo rugged waterproof and shockproof enclosure with a 10Gbps interface.
More speed and features also lead to higher prices for external 2.5-inch SATA enclosures, as with this Ineo rugged waterproof and shockproof enclosure with a 10Gbps interface.
Amazon
More speed and features also lead to higher prices for external 2.5-inch SATA enclosures, as with this Ineo rugged waterproof and shockproof enclosure with a 10Gbps interface.
Amazon
Amazon
You can also find some external 2.5-inch enclosures with a Type-C interface on the enclosure. They are usually specified according to USB 3.2 Gen2 and are therefore theoretically designed for 10Gbps. This allows you to almost fully utilize the SATA interface and achieve data rates of 530- to 560MBps. The enclosures start at around $20. Any extras are reflected in the purchase costs.
For example, models that protect the drive from drops or the elements are correspondingly more expensive. This is shown, for example, by the Ineo 2.5 inch USB 3.1 Gen2 Type C Rugged Waterproof & Shockproof External Hard Drive Enclosure for around $20.
SSD docking station – with one or two bays
If you want to continue using the removed drive without any detours, you can consider a docking station for hard drives. You can access the storage via USB — similar to an external hard drive.
Although the SSD is less mobile in the docking station, it can be easily stored on the desk. For starters, the hard drive accessory offers one bay and was originally intended for the reuse of magnetic hard drives.
If you still have an old model that is only supposed to be compatible with HDDs, give it a try. In many cases, it also recognizes flash memory — provided it has a SATA interface.
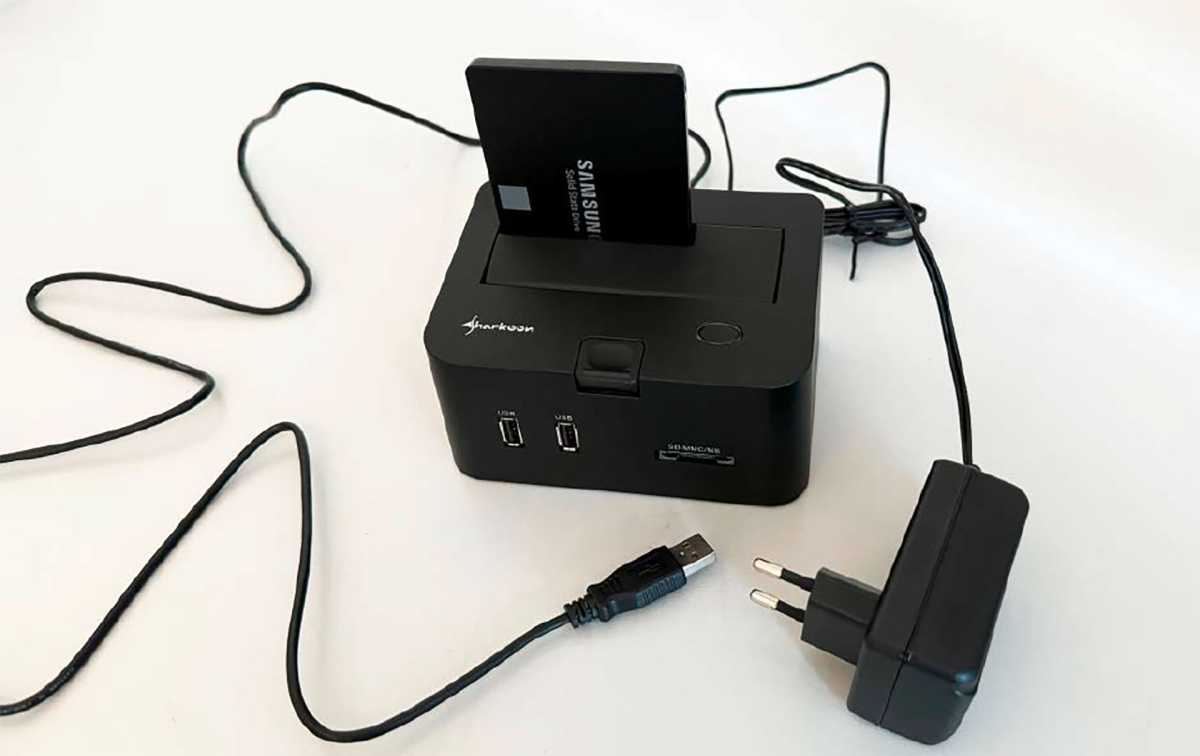
Old docking stations for HDDs can also work with SSDs – such as the Sharkoon Quickport Pro from the editorial team’s stock. Due to the USB 2.0 interface, data transfer is correspondingly slow.
Old docking stations for HDDs can also work with SSDs – such as the Sharkoon Quickport Pro from the editorial team’s stock. Due to the USB 2.0 interface, data transfer is correspondingly slow.
IDG
Old docking stations for HDDs can also work with SSDs – such as the Sharkoon Quickport Pro from the editorial team’s stock. Due to the USB 2.0 interface, data transfer is correspondingly slow.
IDG
IDG
For the test, insert the drive directly into the bay and thus into the SATA port. As the devices are designed for 3.5-inch HDDs, they come with an external power supply unit.
Once fitted, connect the docking station to the computer via USB and only then switch it on. As a rule, Windows recognizes it without any extra driver installation.
If you do not see the drive in Explorer, open the drive management and check whether the SSD is listed there. You will often have to reformat the drive before using it again. Caution: All data stored on the drive will be lost.
While older docking stations also have correspondingly slow USB connections — usually USB 2.0 — current versions are keeping up with the times. Single-slot systems with a USB-C connection and data transfers up to 10Gbps (USB 3.2 Gen2) start at around $40.
Models with two bays usually have an integrated cloning function that allows you to create a complete copy of one drive onto a second without a PC connection.
Such docks cost a good $45 and upwards. Docking stations that work with NVMe drives as well as SATA drives are even more expensive at around $70 — such as the Sabrent USB Type-C Lay Flat Docking Station for M.2 PCIe NVMe + SATA 2.5′”/3.5″ SSD & HDD.
Before you buy, take a look at the maximum storage capacity that is accepted. The Sabrent example mentioned is comparatively generous at 30TB.
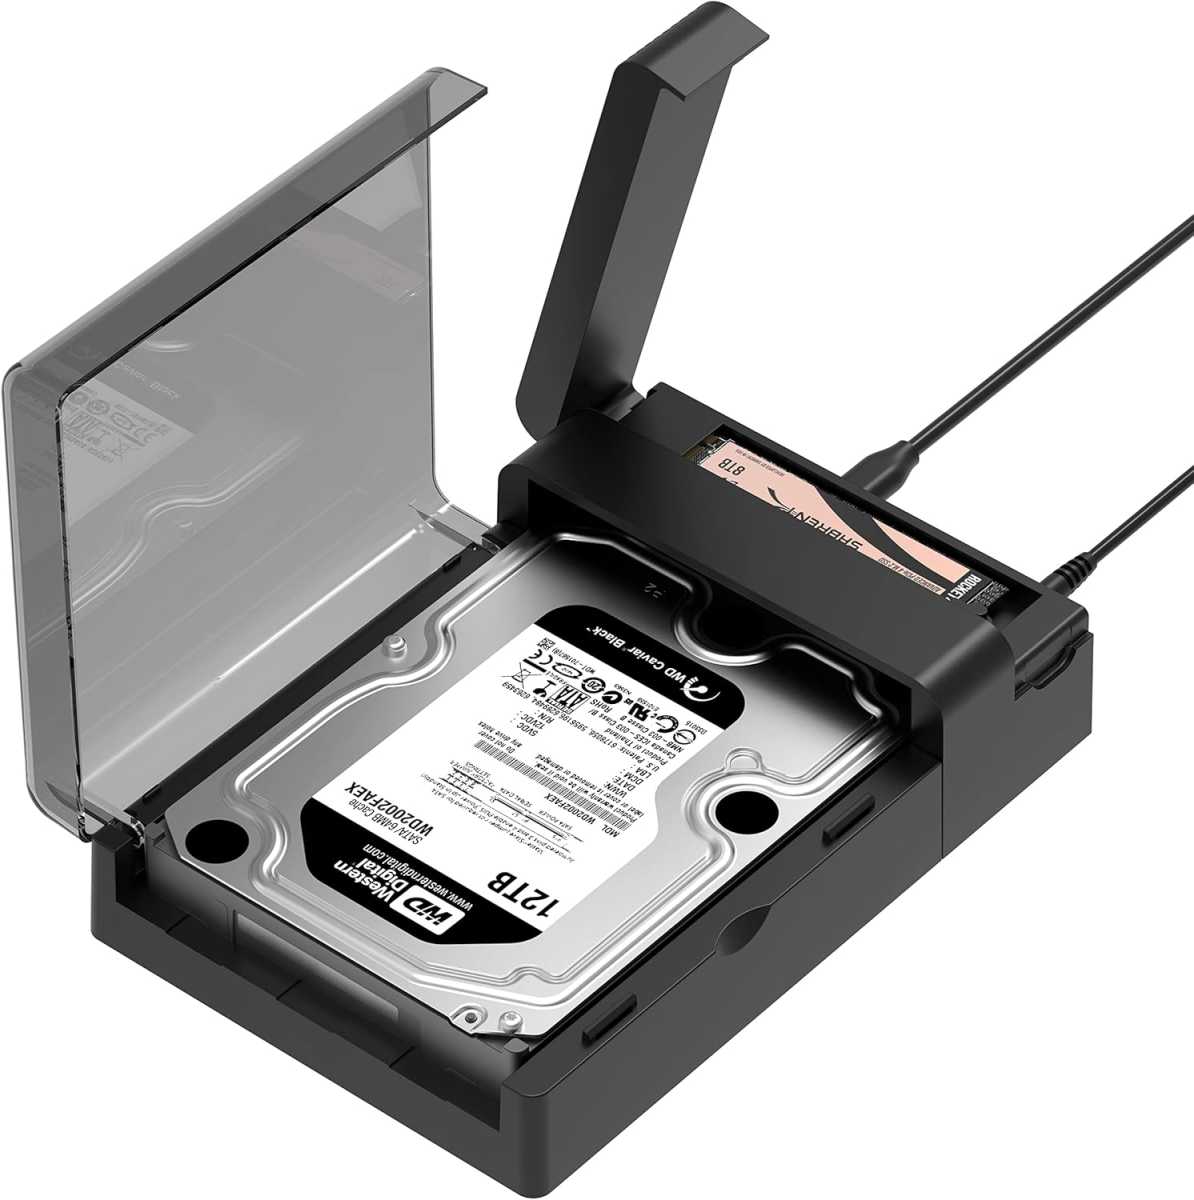
Current docking stations (here a model from Sabrent) are suitable for both 2.5-inch SSDs and M.2 storage devices, can handle high capacities, and offer 10Gbps via USB-C.
Current docking stations (here a model from Sabrent) are suitable for both 2.5-inch SSDs and M.2 storage devices, can handle high capacities, and offer 10Gbps via USB-C.
Amazon
Current docking stations (here a model from Sabrent) are suitable for both 2.5-inch SSDs and M.2 storage devices, can handle high capacities, and offer 10Gbps via USB-C.
Amazon
Amazon
Simple USB adapters
Adapters for SATA or PCIe to USB are intended less as a permanent solution and more for moving disks or a quick SSD function check. In the case of SSDs, you can dispense with an external power supply for the adapter.
Corresponding SATA to USB adapters are available for as little as $7. The USB-A interface, which is specified according to USB 3.2 Gen1 with a maximum speed of 5Gbps, dominates in this price range.
USB 3.0 or superspeed USB is also often mentioned in the respective product description. For variants with an external power supply, you can expect to pay around $20 or more.
The selection of USB adapters with an M.2 slot is still relatively small. In the simplest case, they consist of a corresponding slot, the converter, and a USB port.
Even for this simple version, the price starts at around $20. You plug the flash memory into the M.2 port and screw it onto the small piece of circuit board. This can usually accommodate the standard sizes from 2230 to 2280 millimeters. Screws and screwdrivers are usually included.
It is particularly important to take a close look at the simple adapters, as the M.2 connection can be used for both SATA and NVMe SSDs, but not all adapters automatically support both connection types.
M.2 adapters with a stand make it easier for you. Ideally, they are compatible with SATA and NVMe SSDs and enable connections to both Type A and Type C interfaces.
These dual adapters offer USB 3.2 Gen2 speed and start at around $30. You can find an example of this in the M.2 NVMe & SATA to USB C Docking Station. The adapter is even visually enhanced with RGB lighting.
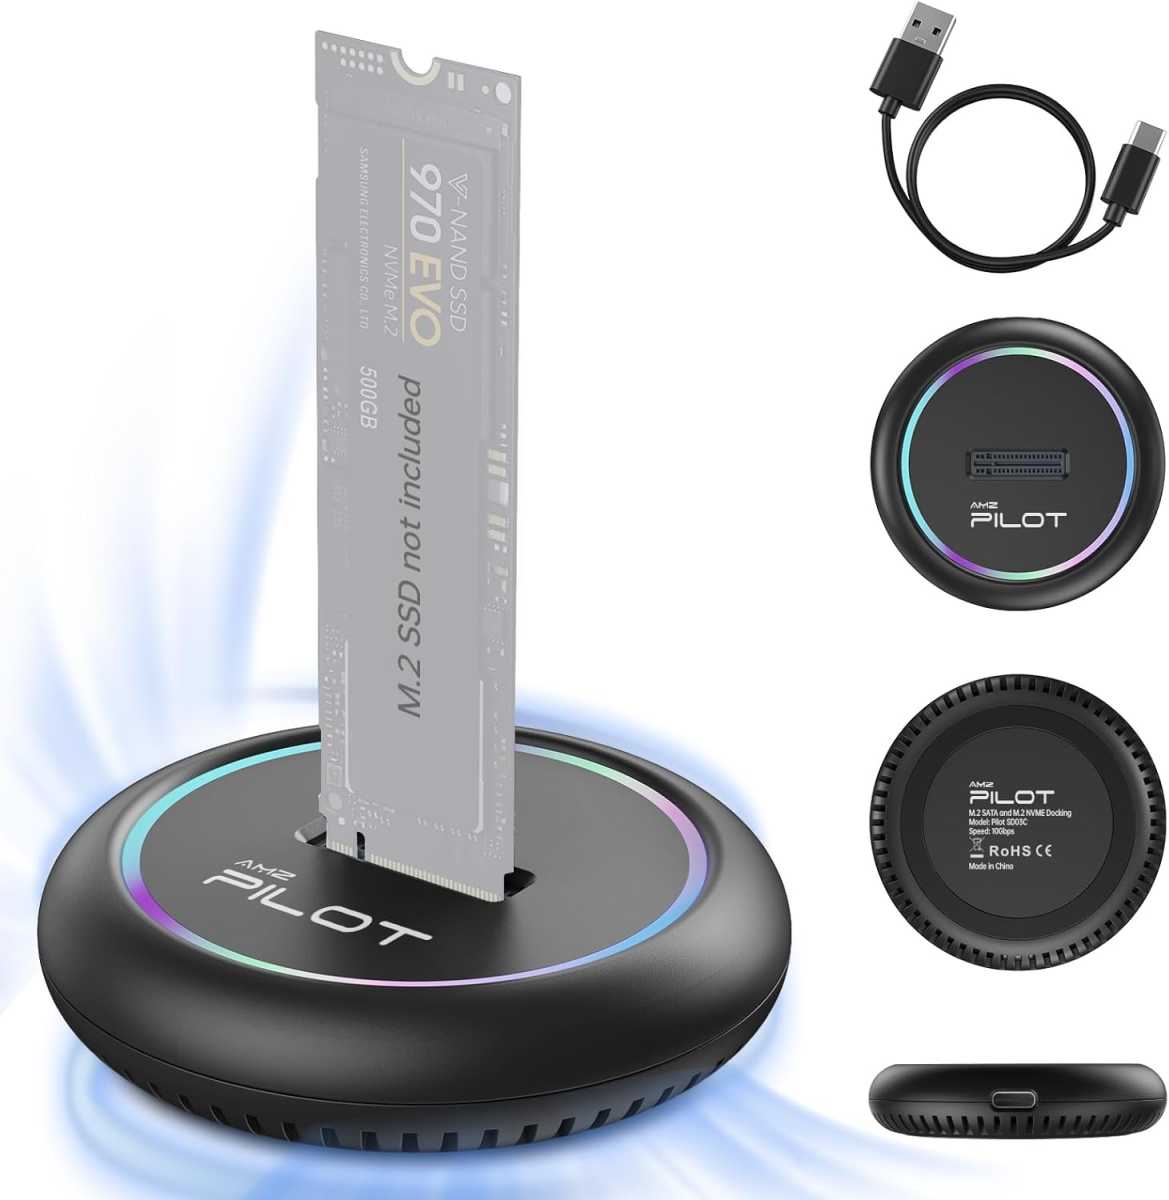
Dual adapters for the M.2 slot accept SATA and NVMe SSDs — here, for example, the M.2 NVMe & SATA to USB C Docking Station. Thanks to the stand, all common storage devices with the usual width of 22 millimeters fit.
Dual adapters for the M.2 slot accept SATA and NVMe SSDs — here, for example, the M.2 NVMe & SATA to USB C Docking Station. Thanks to the stand, all common storage devices with the usual width of 22 millimeters fit.
Foundry
Dual adapters for the M.2 slot accept SATA and NVMe SSDs — here, for example, the M.2 NVMe & SATA to USB C Docking Station. Thanks to the stand, all common storage devices with the usual width of 22 millimeters fit.
Foundry
Foundry
SSD enclosure with M.2
As the storage latches for the M.2 slot are very small, most external housings are also compact. This makes them a good solution if you want to convert an internal M.2 SSD into a drive for travelling that takes up little space.
You will now find the largest selection of enclosures with a Type-C connection, which is specified for USB 3.2 Gen2. The connection type provides enough bandwidth for fast data transfers and is supported by almost all current computers with USB-C ports.
The actual transfer speed you achieve depends on the interaction between the SSD built into the housing, the converter chip, and the external interface.
An example: An NVMe SSD for PCIe 3.0 (Peripheral Component Interconnect Express), which is connected in the computer slot with ideally four lanes (x4), achieves a transfer speed of around 1GBps via each lane.
In computer terms, it is therefore slowed down in the external housing by the USB 3.2 Gen2 interface alone.
In our tests of external NVMe SSDs, sequential transfer rates of a good 900- to over 1,000MBps are quite realistic in the benchmark. With SATA M.2 SSDs, they are significantly lower due to the interface.
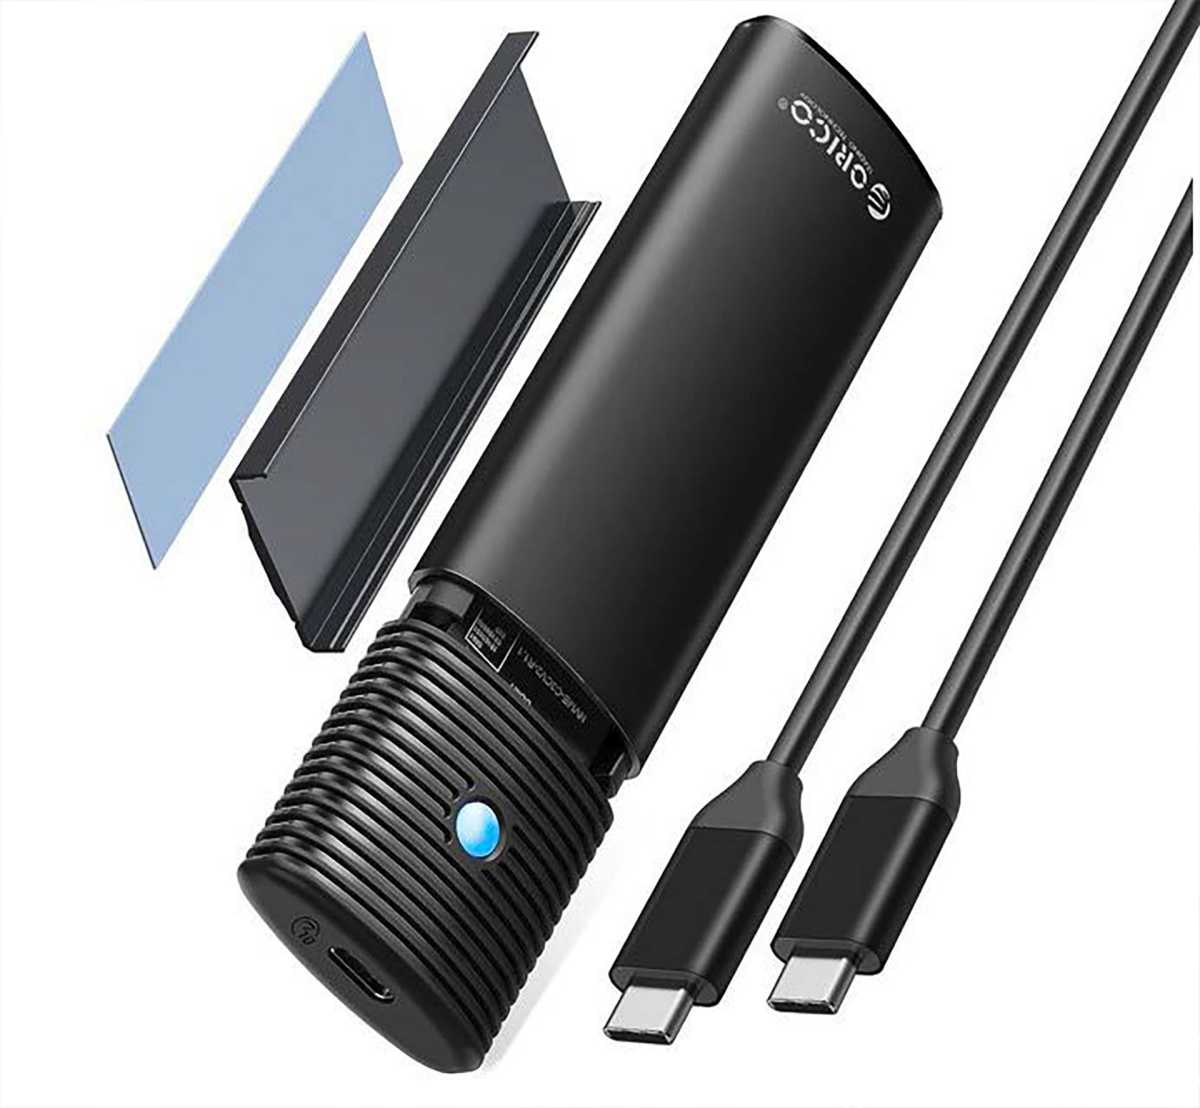
Hard drive housings for the M.2 SSD form factor are compact. If they are suitable for SATA and NVMe flash memory (as here with the Orico PWDM2), they are more expensive than models that can only accommodate one type of SSD.
Hard drive housings for the M.2 SSD form factor are compact. If they are suitable for SATA and NVMe flash memory (as here with the Orico PWDM2), they are more expensive than models that can only accommodate one type of SSD.
Orico
Hard drive housings for the M.2 SSD form factor are compact. If they are suitable for SATA and NVMe flash memory (as here with the Orico PWDM2), they are more expensive than models that can only accommodate one type of SSD.
Orico
Orico
When buying an enclosure, start with your used M.2 SSD. Enclosures for M.2 SATA SSDs are currently available from 16 euros. Enclosures that fit both M.2 SSD types are more expensive.
Expect to pay around $25 and upwards — such as for the Orico PWDM2. This model also has the advantage that you can install the SSD without tools. As a rule, you place a silicone cooling pad on the internal flash drive. This ensures that the heat can be dissipated better.
As the transfer speed of the Type-C interface increases, so does the price of the external housing. You can expect to pay over $45 for a model with a USB 3.2 Gen2x2 connection and therefore a speed of 2GBps.
These enclosures are only suitable for NVMe SSDs and often come with ribs to effectively dissipate the heat that increases with the operating speed from the inside to the outside. The design makes perfect sense, but comes at the expense of compactness.
Enclosures for Thunderbolt and USB 4
The most expensive enclosures currently available include models with Type-C interfaces for Thunderbolt 3 and 4 or USB 4, which are designed for up to 40Gbps. As the high speed also increases the heat inside, these housings are made of aluminum, have cooling fins, and some are even equipped with a mini fan.
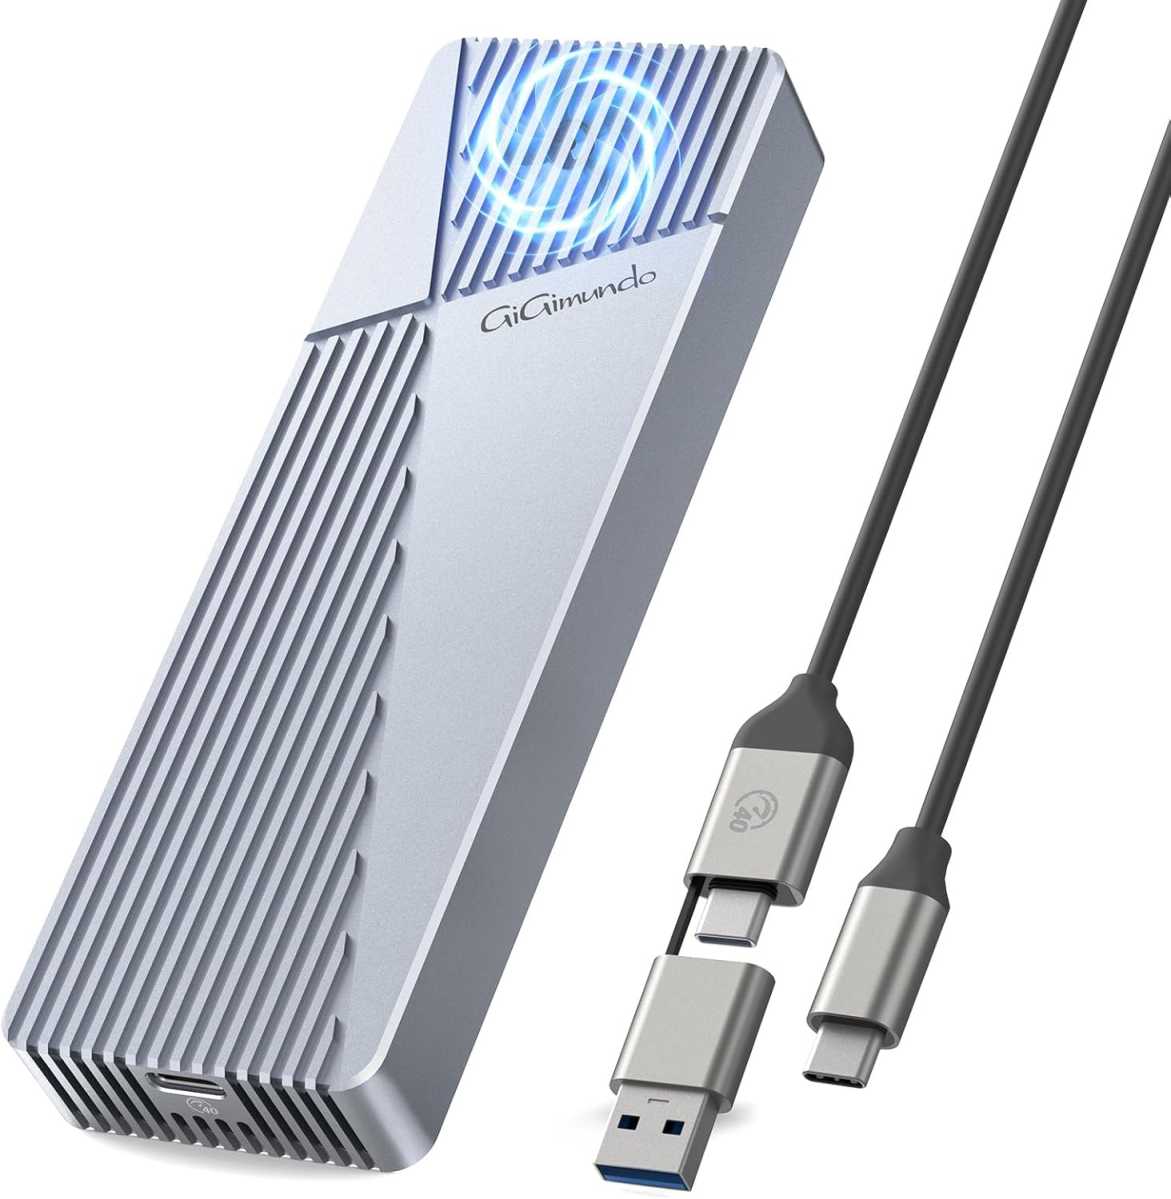
USB 4 enclosures such as the GiGimundo GAM2-U4 USB4 NVMe Enclosure with built-in mini fan are relatively new and can be expensive.
USB 4 enclosures such as the GiGimundo GAM2-U4 USB4 NVMe Enclosure with built-in mini fan are relatively new and can be expensive.
Foundry
USB 4 enclosures such as the GiGimundo GAM2-U4 USB4 NVMe Enclosure with built-in mini fan are relatively new and can be expensive.
Foundry
Foundry
The more is built in, the higher the prices. Passively cooled cases start at around $80. Variants with an integrated fan, such as the GAM2-U4 USB4 NVMe Enclosure, cost more, sometimes as much as $140.
In our tests with a NVMe SSD Kingston SNV2S/1000G and a Ugreen CM642 with PCIe 4.0 on a USB 4 port with 40Gbps, the external drive delivered a good 2,500MBps in read and a good 2,050MBps in write in the benchmark — that’s quite an achievement.
SSD enclosures like these are worthwhile if you regularly want to back up extremely large amounts of data, such as those used for video editing.
Special solution: USB-C hub
Ultra-mobile notebooks are increasingly focusing on USB-C as an external interface. There is therefore no way around a docking station or a Type-C hub if you want to continue using your usual devices such as monitors or USB sticks.
If the Type-C hub needs to be a little larger, you can even find models with an M.2 slot for a SATA and/or NVMe SSD. Once again, you should check carefully whether the SSD slot is suitable for your flash memory.

If you need a USB-C docking station anyway, you can opt for a model with an M.2 slot for an SSD — like the Wavlink USB-C Docking Station shown here. The flash memory is quickly inserted and behaves in practice exactly as you would expect from an external SSD.
If you need a USB-C docking station anyway, you can opt for a model with an M.2 slot for an SSD — like the Wavlink USB-C Docking Station shown here. The flash memory is quickly inserted and behaves in practice exactly as you would expect from an external SSD.
Amazon
If you need a USB-C docking station anyway, you can opt for a model with an M.2 slot for an SSD — like the Wavlink USB-C Docking Station shown here. The flash memory is quickly inserted and behaves in practice exactly as you would expect from an external SSD.
Amazon
Amazon
Multi-connectors with a combo slot for both M.2 SSD types make things easier for you. In addition to the integrated disc slot, the number and capabilities of the connections determine the price.
On average, USB-C hubs with an M.2 SSD slot start at around $50. Corresponding docking stations start at a good $80.
We recommend checking the product description for the connections carefully to avoid making the wrong purchase. In the case of NVMe SSDs, USB-C with 10 Gbps is the predominant speed — for example with the Wavlink USB C Docking Station for a good $110.
The SSD slot (NVMe and SATA) is located under the top cover. You do not need any tools to insert the SSD. The SSD fixation can be turned into the correct position by hand.
As usual, place a cooling pad on the SSD to dissipate heat. When connected to the computer, the SSD in the adapter behaves in the same way as an external storage device connected to the USB port.
This article originally appeared on our sister publication PC-WELT and was translated and localized from German.
Author: Ines Walke-Chomjakov, Contributor

Ines Walke-Chomjakov takes care of everything you need to know about IT peripherals. Her specialist areas include printers, external SSDs and HDDs, network storage, and displays. Outside her work here, she dedicates her heart and soul to the IT series Digital Life Step by Step, which imparts practical knowledge about Windows, iPhone or Fritzbox in monothematic editions.


